Rich text and links
Write and format text with headings, lists and tables, add buttons and icons, and link to pages, elements, files, addresses, email and phone numbers.
Most texts on your website are written in a text field called Body: paragraphs with bold and italic words, headings, lists, links and, in some elements, tables, buttons and icons. This page explains the toolbar, the Link browser and what the editor deliberately leaves out.
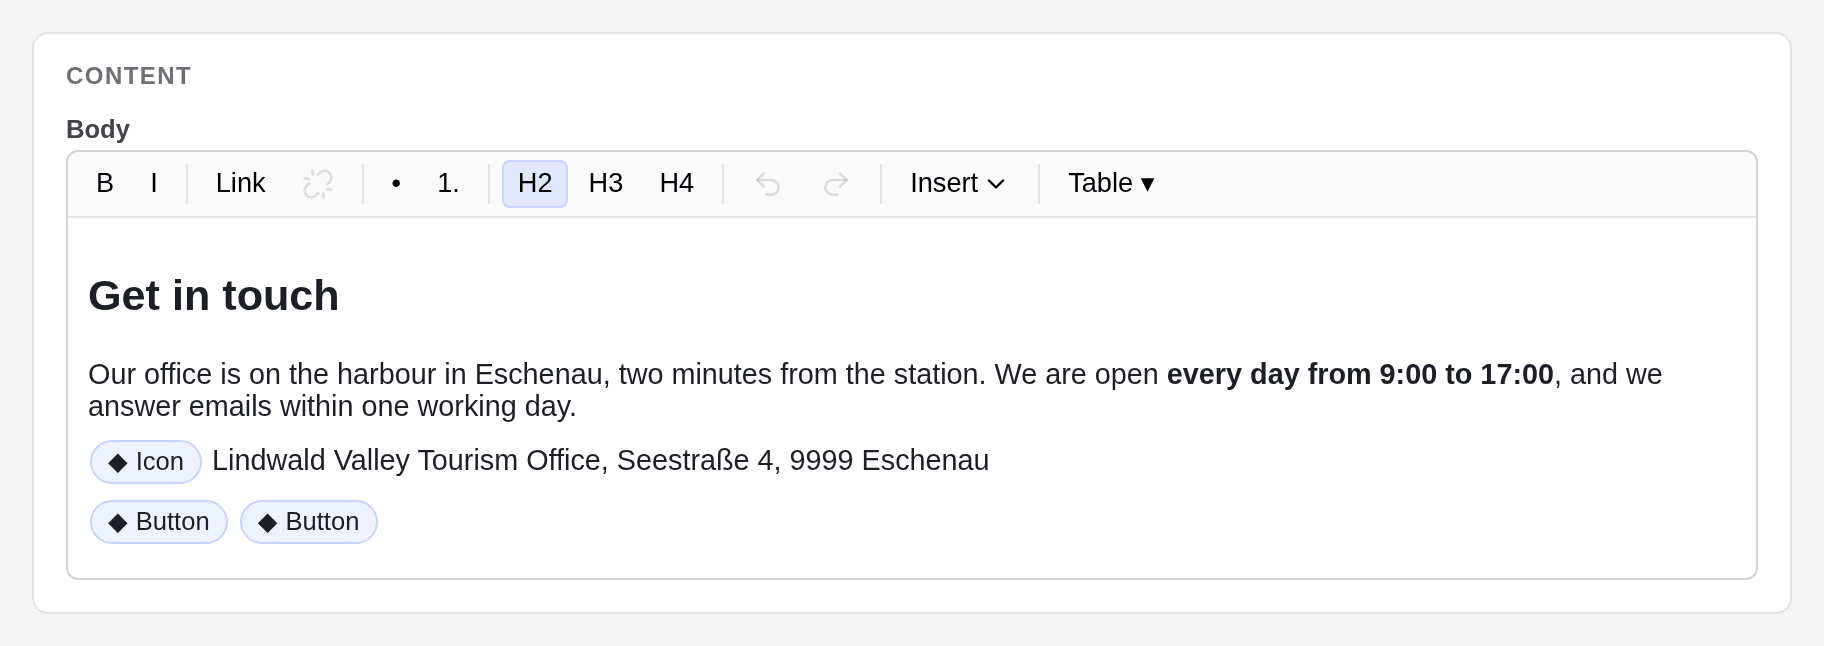
The toolbar
| Button | What it does |
|---|---|
| B | Makes the selected text bold. |
| I | Makes the selected text italic. |
| Link | Turns the selected text into a link and opens the Link browser. |
| Unlink (broken chain) | Removes the link the cursor is in. |
| • and 1. | Start a bullet list or a numbered list. |
| H2, H3, H4 | Turn the paragraph into a heading of that level. |
| Undo and Redo (arrows) | Undo or redo your last edits in this field. |
| Insert | Places a button or an icon in the text. |
| Table ▾ | Inserts and changes a table. |
Each element shows only the buttons it allows: a Quote, for example, offers only bold, italic and links.
Headings
Use H2 for the main sections of a text and H3 and H4 for the parts within them. There is no H1: the page title is the one main heading of every page, which keeps the structure clear for visitors, screen readers and search engines.
Keyboard and typing shortcuts
| Keys | Effect |
|---|---|
| Ctrl+B, Ctrl+I | Bold, italic |
| Ctrl+Alt+2, 3 or 4 | Heading 2, 3 or 4 |
| Ctrl+Shift+8, Ctrl+Shift+7 | Bullet list, numbered list |
| Tab, Shift+Tab | Indent or outdent a list item |
| Shift+Enter | Line break within a paragraph |
| Ctrl+Z, Ctrl+Shift+Z | Undo, redo |
| ## and a space at the start of a line | Heading 2 (### for heading 3, #### for heading 4) |
| a hyphen or an asterisk and a space at the start of a line | Bullet list |
| 1. and a space at the start of a line | Numbered list |
On a Mac, use Cmd instead of Ctrl, and Cmd+Option for the headings. Two asterisks before and after a word make it bold while you type, one makes it italic.
Tables
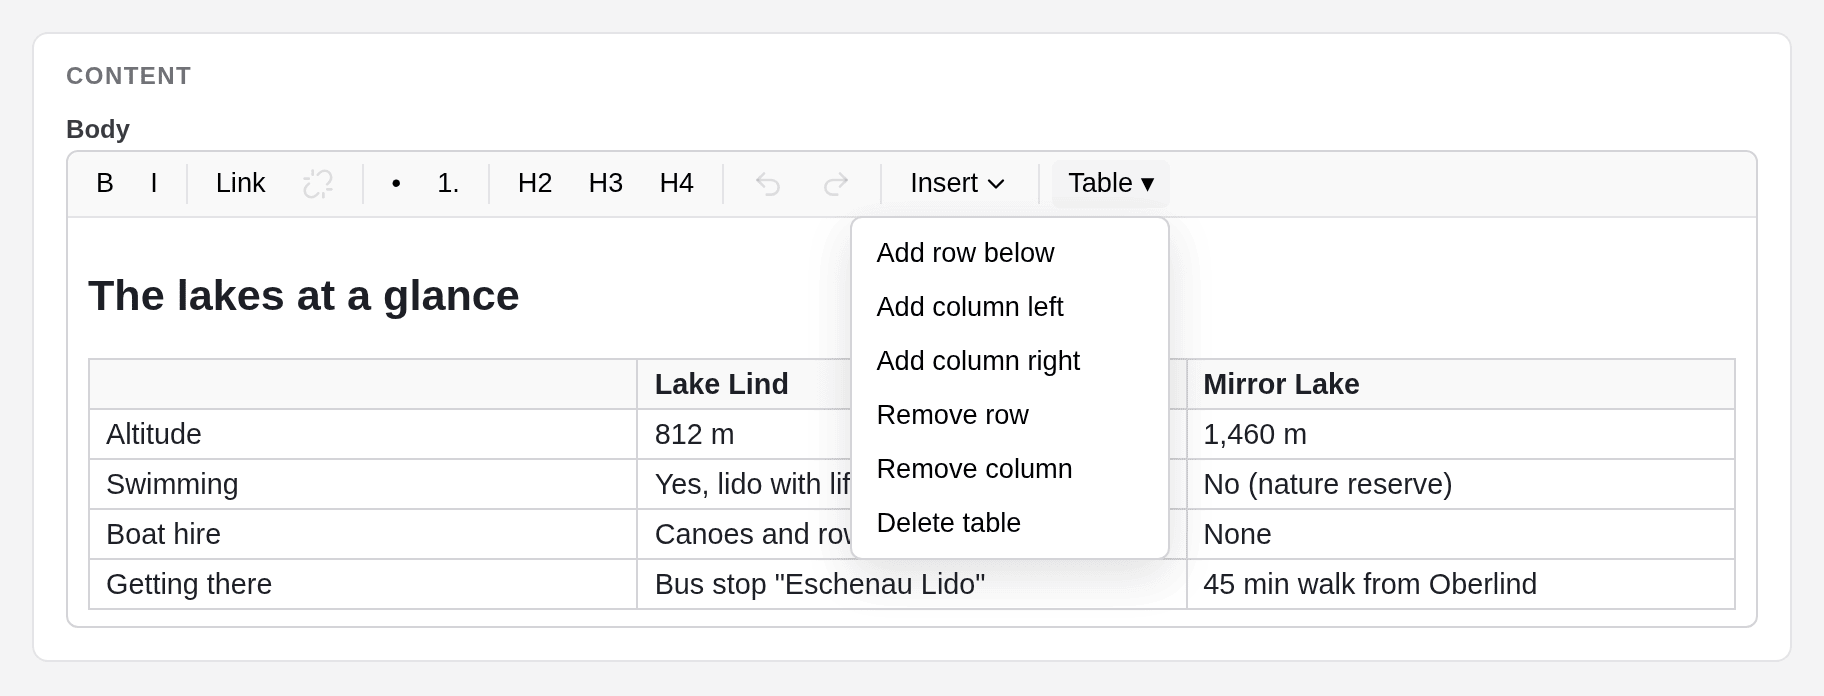
Elements that allow tables (on a standard site, the Text element) have a Table ▾ button.
- Table ▾ and Insert table adds a small table with a header row.
- With the cursor in a cell, Table ▾ offers Add row below, Add column left, Add column right, Remove row, Remove column and Delete table.
- Tab moves to the next cell; Tab in the last cell adds a new row. Shift+Tab moves back.
- The first row is always the header. A cell holds one line of text with bold, italic, links, buttons or icons, but no lists or headings, and cells cannot be merged.
Buttons and icons in the text
Some elements let you place a Button (a link that looks like a button) or an Icon inside the text. In the editor they appear as a small pill with ◆ and their name.
Place the cursor
Click where the button or icon should appear.
Click Insert and choose Button or Icon
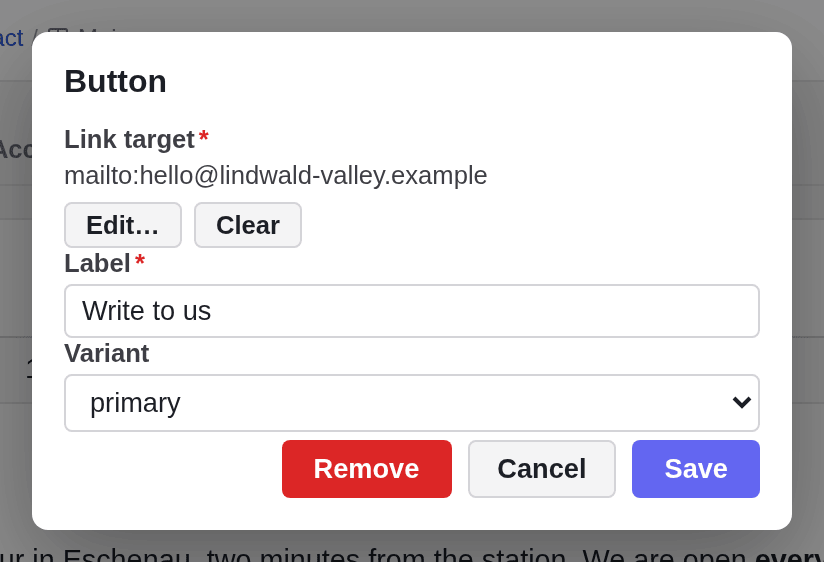
A small form opens. A button needs a Link target and a Label, and you can pick a Variant; an icon needs an Icon name.
Click Insert
The pill appears in the text. Insert only works once the required fields are filled in; Cancel adds nothing.
Save the form
To change a button or an icon, click its pill: its form opens with Save, Cancel and Remove. Backspace or Delete also removes a pill, like a letter.
Links
Add a link
Select the text
Mark the words that should become the link.
Click Link
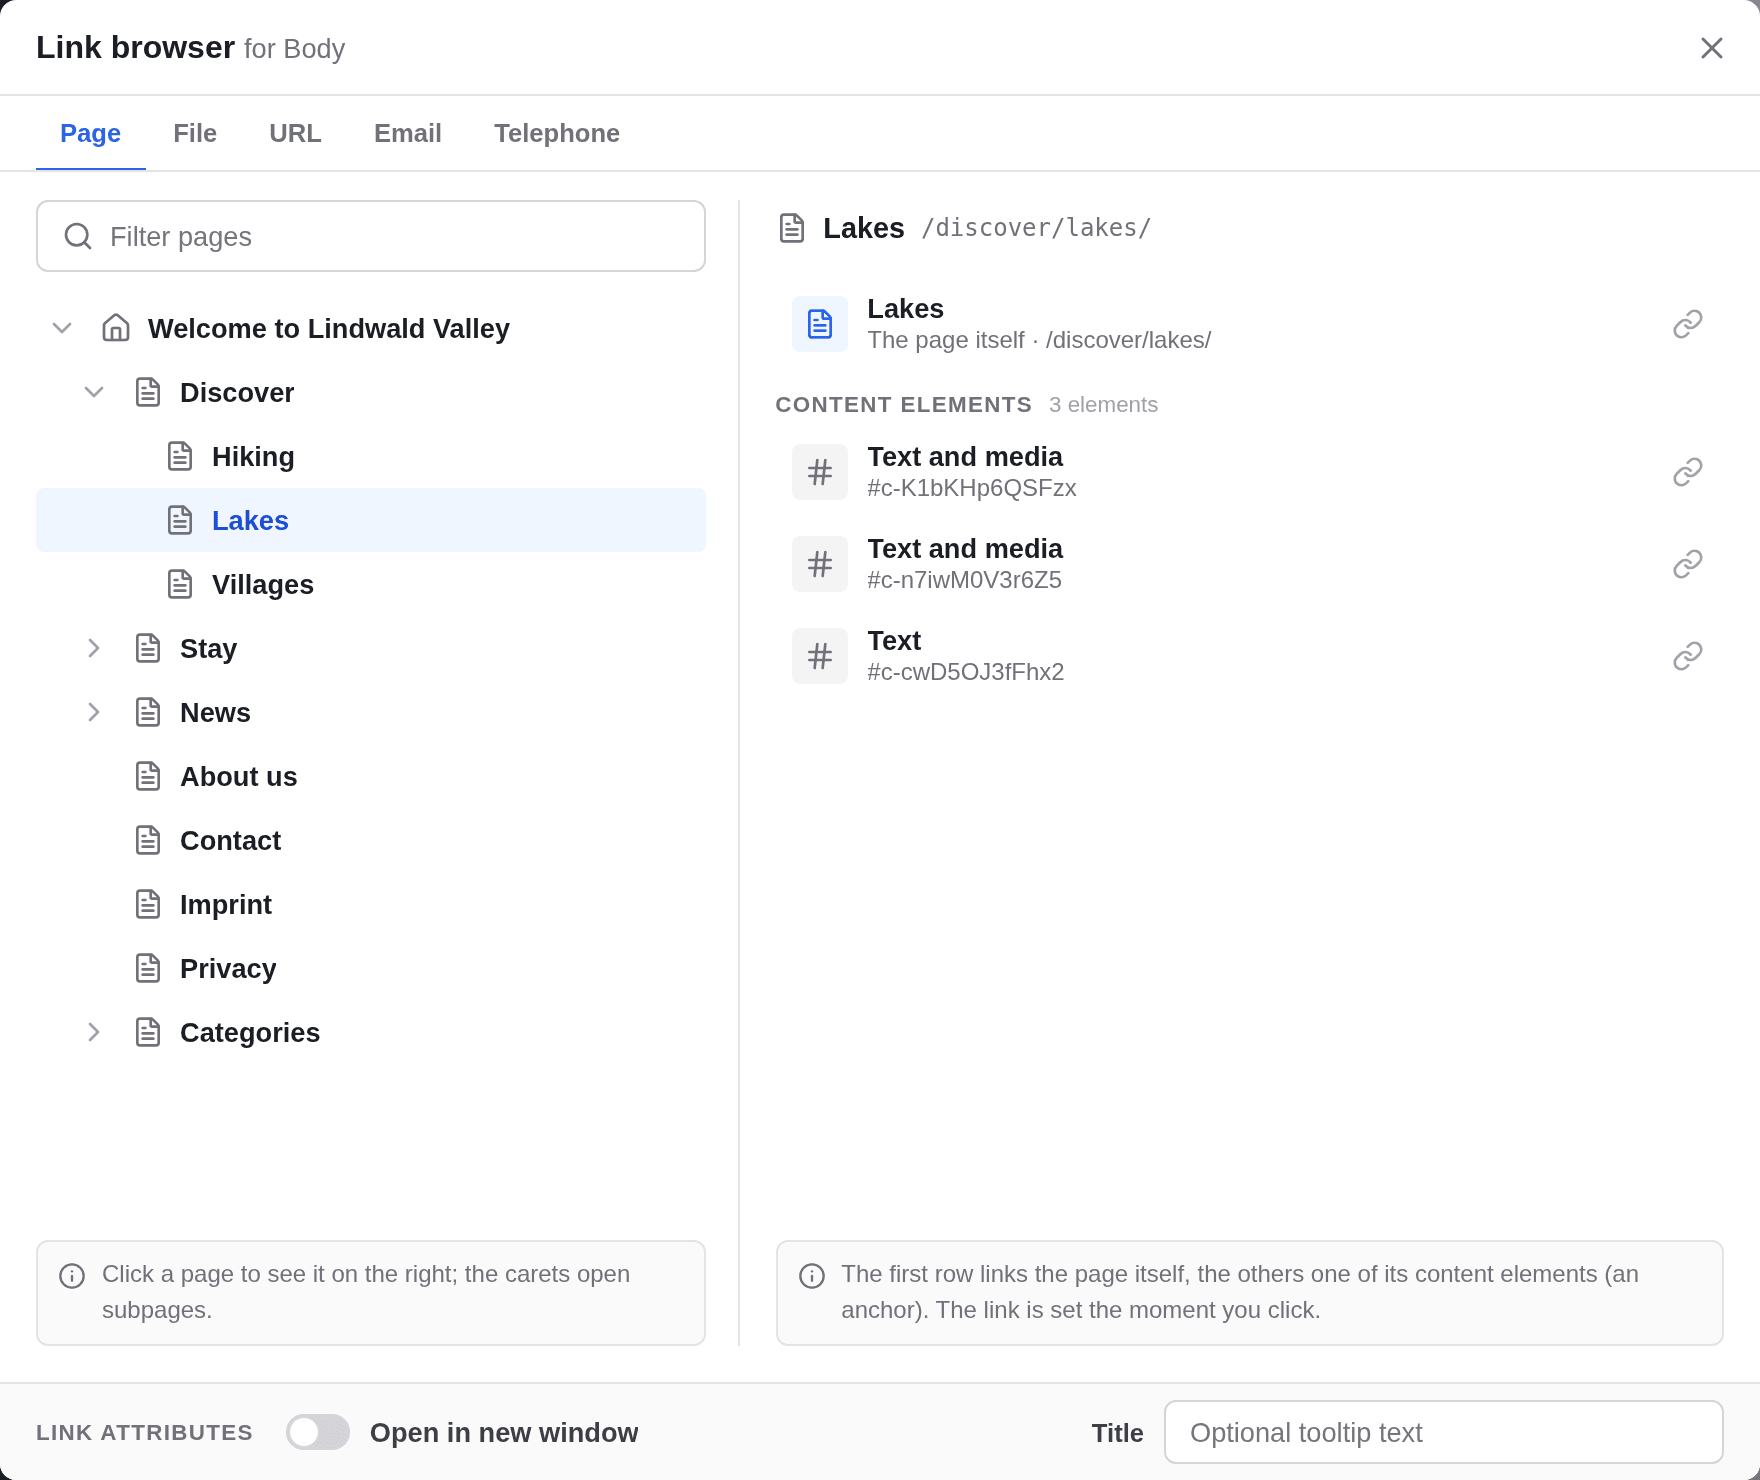
The Link browser opens on the Page tab.
Set the link attributes first, if you need them
At the bottom, switch on Open in new window or enter a Title (a tooltip). Do this before you choose the target: the link is created the moment you click it.
Choose the target
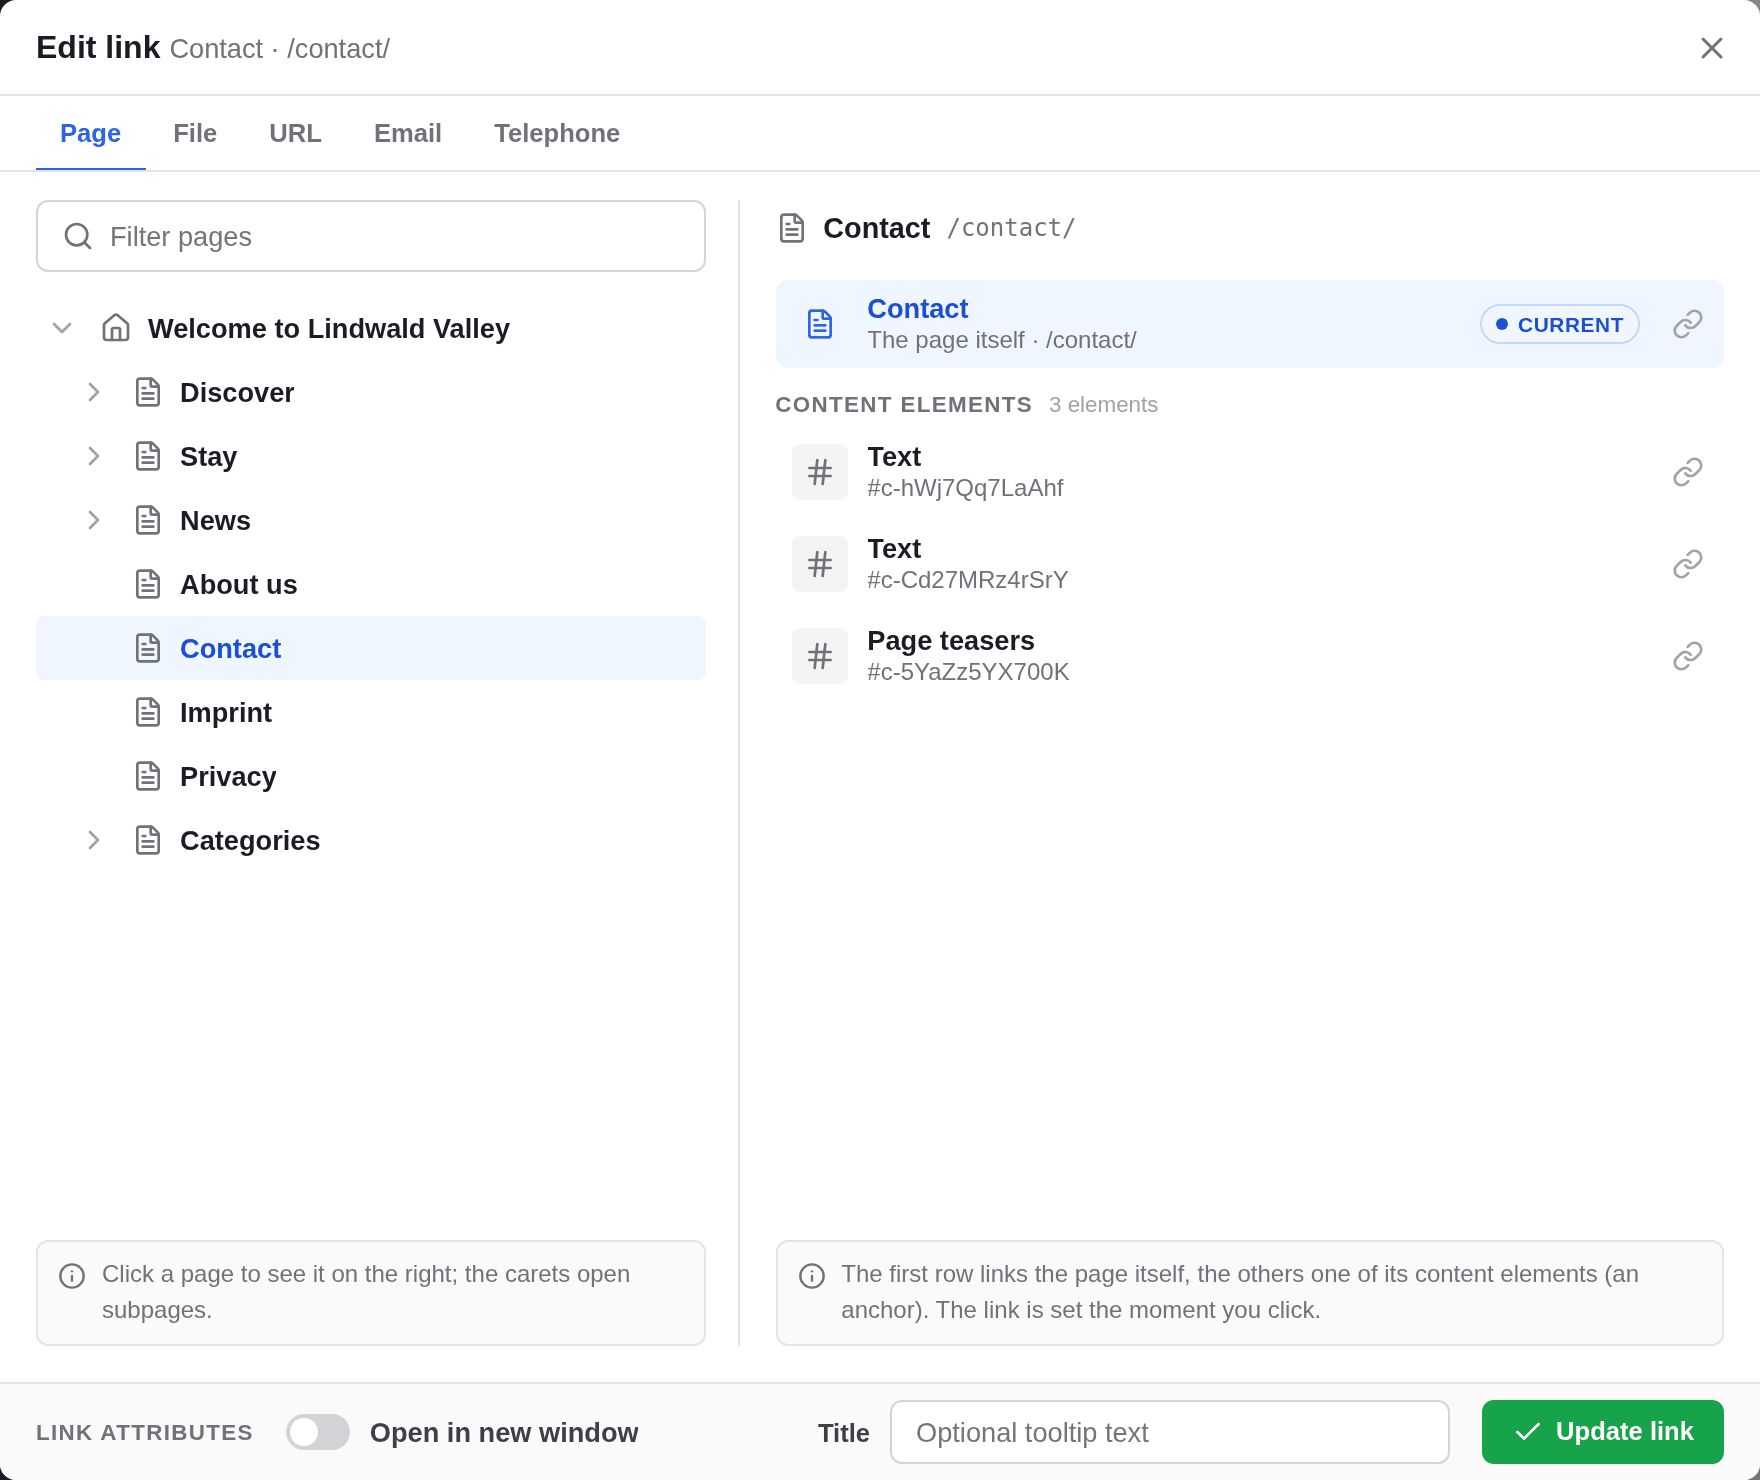
Click a page in the tree on the left (Filter pages finds it by name). On the right, click the first row to link to the whole page, or a row under Content elements to link straight to that element.
Save the form
Other kinds of links
- File: a file from the media library, for example a PDF. You can also upload one here.
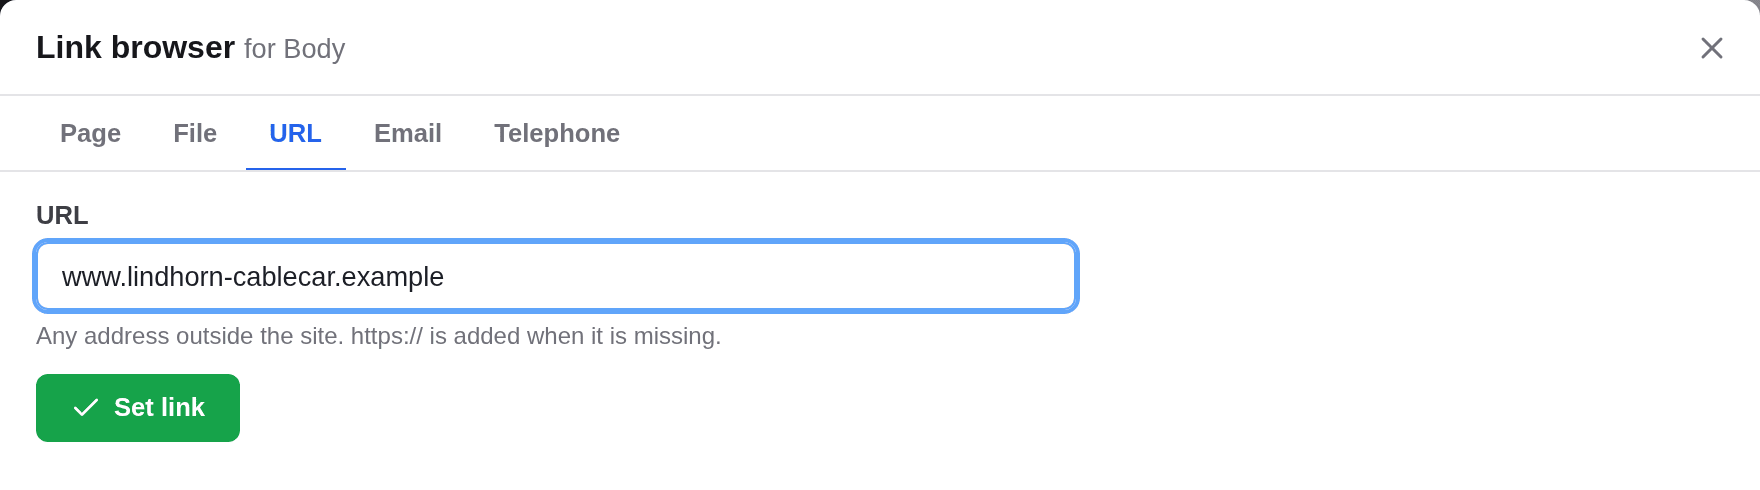
- URL: an address on another website; https:// is added if you leave it out. Pages of your own site belong on the Page tab.
- Email: an email address, opened in the visitor’s email program.
- Telephone: a phone number in international format, for example +43 1 234 56 78.
Type the address and click Set link or press Enter. The button stays greyed out until the input is valid.
Change or remove a link
Place the cursor inside the linked text (click just before it and move in with the arrow keys) and click Link. The Link browser opens as Edit link and marks the target as Current. Click another target to replace it, or change Open in new window or Title and click Update link to keep the target. To remove the link, click Unlink instead.
Link fields
Some elements have a separate link field, such as the Link of a card. Link browser sets it in the same way; once set, the field shows the target with Edit… and Clear.
Links to disabled and untranslated pages
Disabled pages are greyed out in the Link browser and cannot be linked; if a linked page is disabled later, the editor tells you when you publish (see Publishing). A page that is not translated into the language you are editing can be linked; visitors then get the default-language page. Links to your own pages keep working when a page is renamed or moved: the editor updates them.
Pasting from Word or Google Docs
You can paste text from Word, Google Docs or a web page. The editor keeps bold, italic and links, turns headings into the levels the field allows (or into paragraphs), keeps tables where they are allowed and turns web addresses into links. Colours, fonts, underlining, strikethrough, quotes and code become plain text, and pictures are left out: add them with an image element.
What a text cannot do
On purpose, the text editor has no underline, strikethrough, colours, font sizes, alignment, code, quotes, dividing lines or pictures: your website’s design takes care of the look, so every page stays consistent and readable on any screen. For a quote, a picture or a highlighted strip, use an element such as Quote, Images or Call to action (see the Element reference). If you miss something, ask the person who looks after your website.